Overview
In the 2.3.1643 release a feature was added to allow the admin to configure applications to be recorded, for both monitoring and troubleshooting purposes. In addition to this, the ability to download the file and store on an external shared folder was also introduced.
Configuration Steps
Turning the feature on
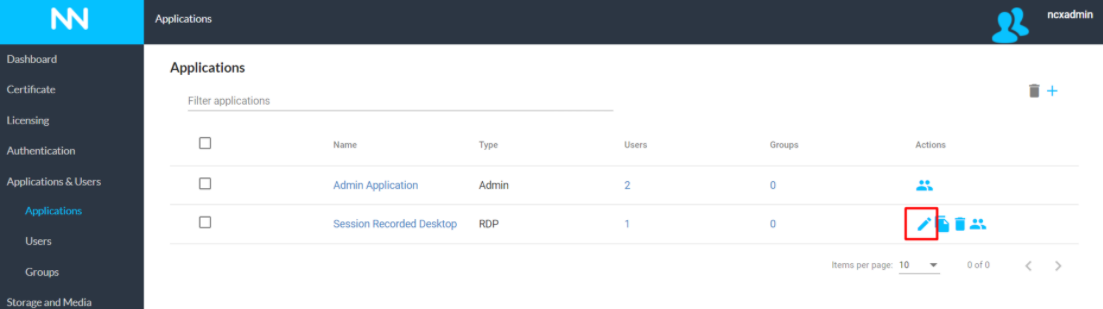
1) Login to the Admin portal and navigate Applications & Users > Applications
2) Open the Edit feature for the specific app by selecting the pen icon
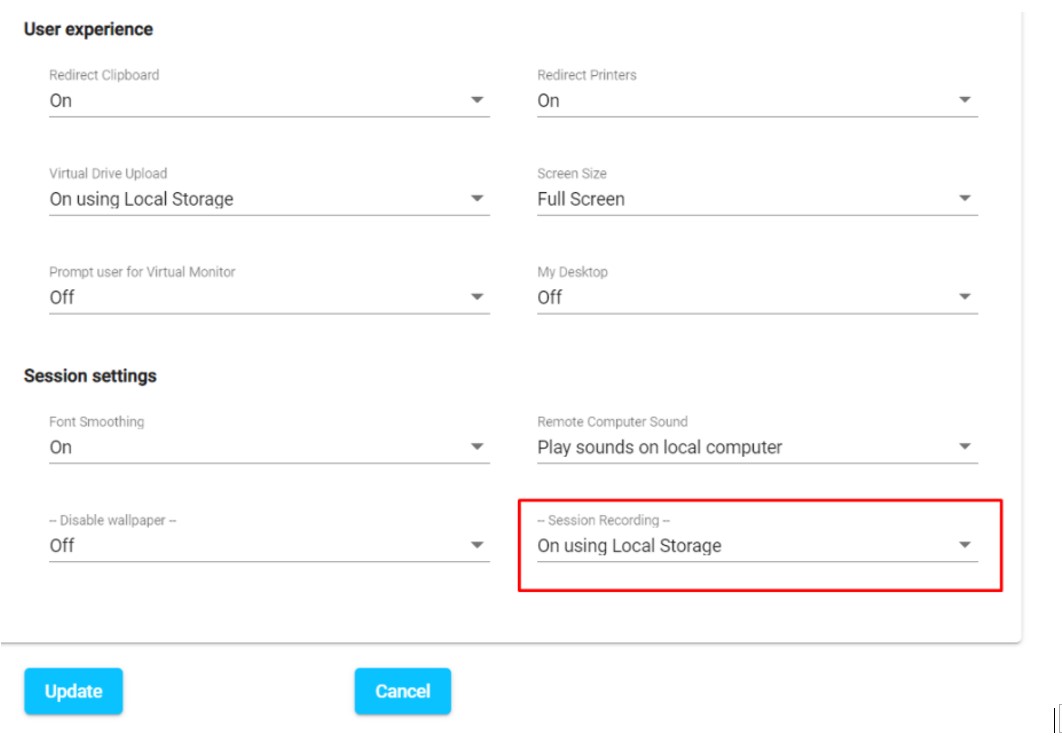
3) Open the Advanced Options section
4) Under Session Recording select one of the following;
a. On using Local Storage = Saves the recorded session to the local NetConnect server storage. Please note that if using this option you will need to ensure you have sufficient capacity to store the recordings. We strongly recommend monitoring your hard drive storage capacity when using this option.
b. On using Remote Storage = Saves the recorded session to the remote mapped drive. Please note an External Drive Path will need to be correctly configured within the Storage and Media > Storage section prior to selecting this option.
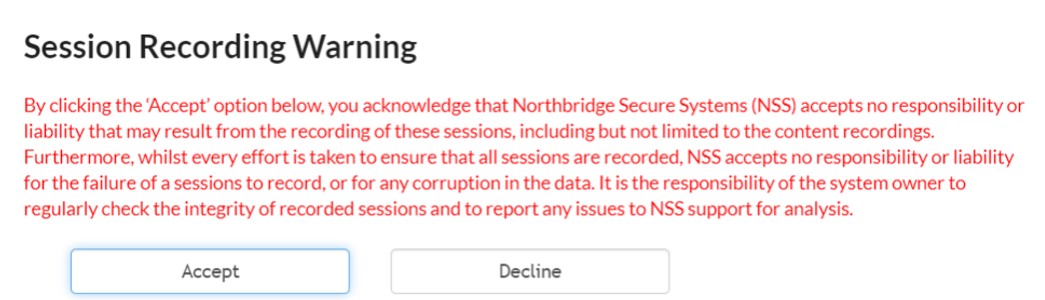
5) Read and accept the warning message
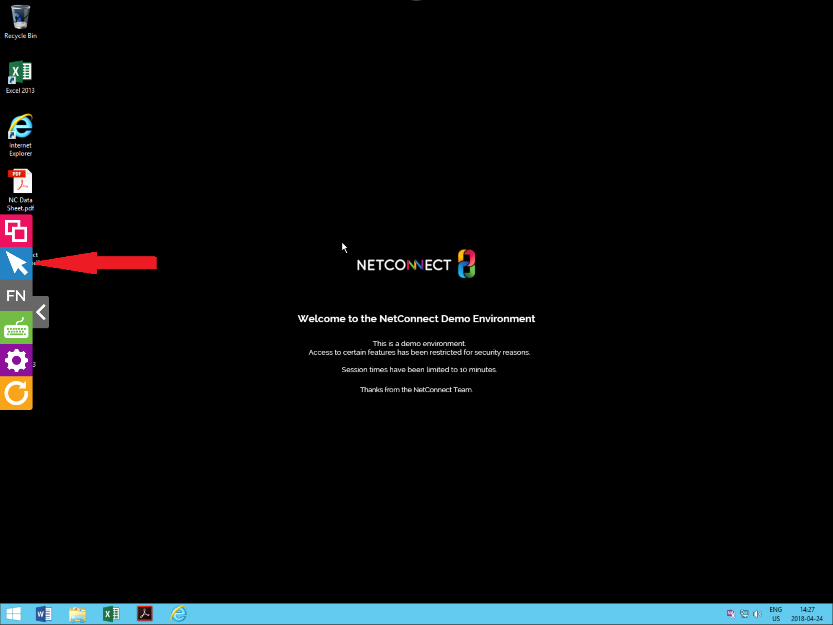
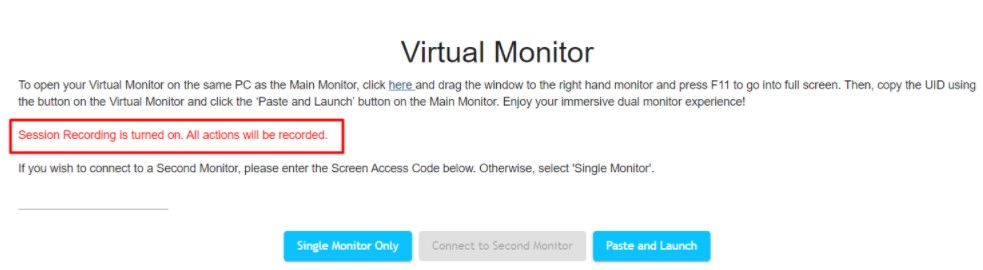
Once this has been configured, whenever the user launches the remote session, they will see the following message
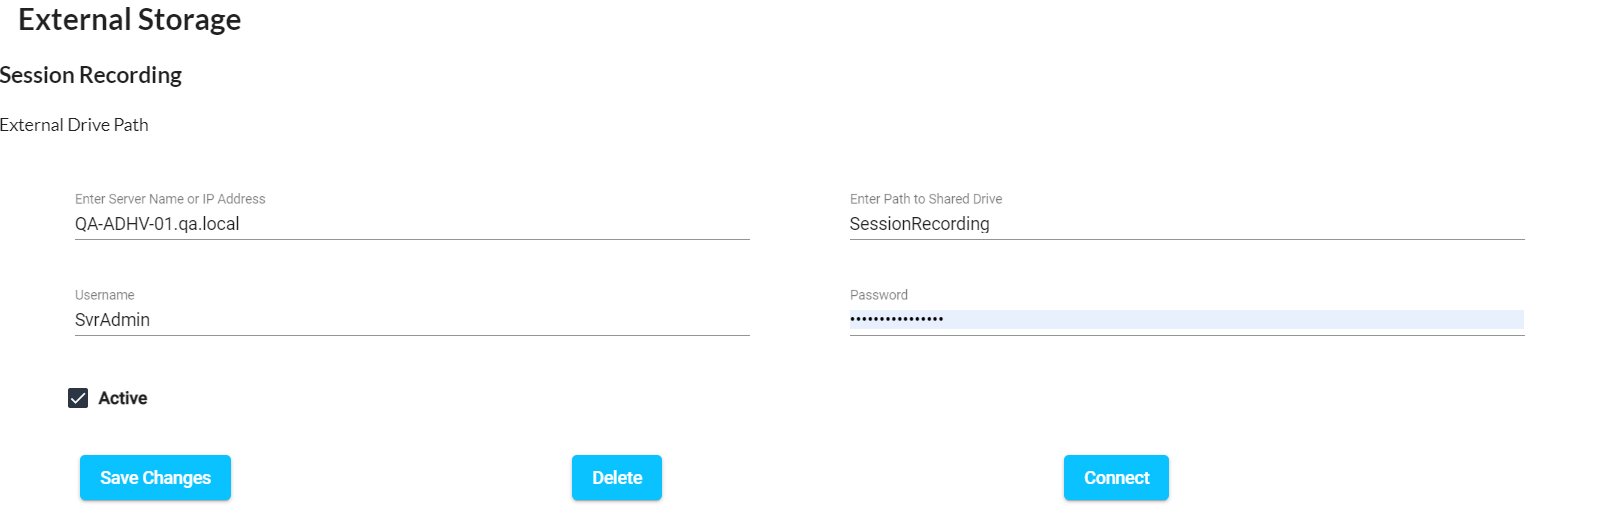
Configuring the External Storage
If you wish to use On using Remote Storage then you will need to nominate a external location for the recorded session files to be stored. This location will need to be a Shared Folder, with read write access for the bind user nominated below.
1) Navigate to Storage and Media > Storage
2) Enter the details as below;
Enter Server name of IP Address: IP Address or Host Name of the server where the Shared Folder that has been nominated as the external location
Enter the path to Shared Folder name: The Share Name of the Shared Folder that has been nominated as the external location
o Ensure the Share Name you enter is consistent with the name of the Share under Computer Management > Shared Folders > Shares > Share Name on the server nominated as the external location
Username: Bind username of the account you wish to use (recommend this is the same as the AD configuration username)
Password: Password for the nominated bind user
Once all fields have been entered, tick the Active checkbox, and then Save Changes and select Connect. You will now be able to configure applications for session recording using the On using Remote Storage option. HYPERLINK BACK TO App Config
How to download the files
All recorded sessions files that are stored locally and on the current nominated external location will be displayed within the Storage and Media > Media.
To download and review your recordings;
1) Login to the Admin portal and navigate Storage and Media > Media and all of the recorded sessions will be shown.
2) Select the download option for the specific file
3) Select resolution and click convert and download. The conversion process will now start. Please note this may take several minutes.
Rough guidelines for download time;
5min vid – 30 secs
10min vid – 2-3 mins
30min vid – 5mins
Please note that this is based on the specs assigned to the NCX environment, so speeds may vary slightly
Once the process is complete, you will be prompted to download the file on the local PC