This page is applicable to NetConnect X 1.5 and above
Overview
This section describes how to set up NetConnect to authenticate users against an external LDAP server, typically Active Directory. The following main steps are required.
Create an Active Directory Authentication Stage
From the Authentication -> Authentication Stages page, click on the ‘Create’ button, select ‘Active Directory’ and click ‘Next’.
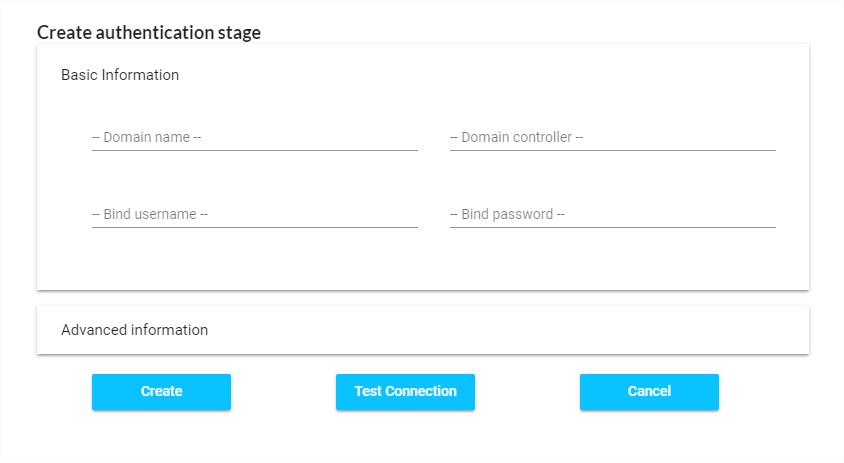
You will be presented with the Basic Information page. Completing the detailed required here will enable you to bind to most Active Directory server. However, additional information may be required depending on your specific setup; in this case, you will be required to enter detail into the Advanced Information section.
Basic Information
The following information is required in order to configure a basic Active Directory Authentication Stage.
| Settings | Description |
| Domain | Enter the domain which the Active Directory is joined to. |
| Domain Controller | Enter either the DNS name or IP address of the Active Directory server. |
| Bind Username | Enter the name of an account with LDAP read access to the full Active Directory hierarchy. We recommend you create an account for this specific purpose. |
| Bind DN | Enter the full distinguished name (DN) of your Bind User. Details on how to locate this can be found here. |
Advanced Information (optional)
| Settings | Description |
| Authentication Stage Name | Enter the name of the authentication stage. Note, this will default to your domain name. |
| Authentication Stage Description | Enter a description of your authentication stage. This is optional. |
| Port | Enter the port number of the Active Directory server. The default value for this field is 389 |
| Login Attribute | Enter the name of the login attribute you wish to use for authentication. By default this is samAccountName. Other attributes can be used, such as UID. |
| Base DN | Specify the point in the directory hierarchy where a search begins. Enter the base DN (or base Object) from which you want to search. By default, this value is determined by the information you enter into the Domain field. |
| Search Filter | Further narrow down the search starting from the base DN by entering a filter(s). This is helpful if two objects have the same user attribute. |
Once you have entered all the required information, you can click ‘Test Connection’ to confirm the Active Directory server can be reached – if this check fails, please confirm the address and bind details are correct. Once you’re happy with your configuration, click ‘Create’. If you wish to use this authentication stage, you will need to click the ‘Activate’ icon before selecting Connect.
Next Steps…
Now your Active Directory Authentication Stage has been configured, you can assign licences to your users or configure and assign applications. Alternatively, you may wish to create an additional authentication stage in order to configure multi-factor authentication.
<< Authentication Stages Creating an Azure Authentication Stage >>